
- The first crossing to the Icebreaker is paid: the smuggler hovercraft at the Shoreline pier costs 700,000 Roubles to board, and getting off the ship again needs a green signal flare and 2,400 Euros. Bring all three before you set out.
- Around step 18 the chapter forks. Once you have reached the damaged door on the roof of the engine room, you must finish one of the BTR Driver's two quests — Stick to It (kill 30 Rogues) or A Bitter Victory (hand him food and drink) — and then return to the BTR driver. Either one carries you past the fork; you do not need both.
- From that point on the walkthrough reaches the Icebreaker through the Shoreline transit or straight from the menu, where earlier it was the transit only — so the paid hovercraft run is a one-off, not something you repeat on every attempt.
Chapter Objectives
- Find out from traders more about the connection between TerraGroup and Paradigm Shipping/Ask Mechanic where the distress signal came from
- Locate the equipment under the cellular tower on Woods
- Repair the equipment under the cellular tower on Woods
- Report back to Mechanic
- Locate and obtain the Paradigm Shipping documentation
- Tell Mechanic about "Boreas"
- Arrange a transport to the icebreaker
- Hand over the AMG-10 fluid to Prapor
- Hand over 3 found in raid Military power filters to Prapor
- Hand over the AMG-10 fluid to Prapor
- Eliminate any 30 targets on Reserve
- Launch a yellow signal flare at the Woods transit on Reserve
- Hand over the AMG-10 fluid to Prapor
- Find an alternative transport to the icebreaker
- Talk to the BTR Driver
- Return to the Hideout
- Return to the BTR Driver
- Tell Mechanic that you found transport to the icebreaker
- Hand over 200 7.62x54mm R BT gzh
- Locate and obtain Skier's reports on Customs
- Burn Skier's reports on Customs
- Eliminate any 15 targets at the smugglers' territories
- Report back to the BTR Driver
- Tell Mechanic that you found transport to the icebreaker
- Eliminate any 10 targets at the smugglers' territories
- Report back to the BTR Driver
- Tell Mechanic that you found transport to the icebreaker
- Board the smuggler hovercraft on Shoreline
- Bring 700, 000 Roubles to pay for the insertion onto icebreaker (optional)
- Bring a green signal flare (optional)
- Bring 2, 500 Euros to pay for the evacuation from icebreaker (optional)
- Arrive at the Icebreaker
- Check if any crew members survived on the ship
- Access the engine room
- Locate and obtain the engine room keycard (optional)
- Reach the engine room (optional)
- Find a way into the icebreaker superstructure
- Ask Mechanic about explosives
- Ask Prapor about explosives
- Arrive at the Icebreaker
- Reach the damaged door on the roof of the engine room
- Break the chain on the door on the roof of the engine room using the SZ-1 charge
- Enter the icebreaker superstructure from the roof of the engine room
- Inspect the crew living quarters in the icebreaker superstructure (optional)
- Find a way to the upper decks of the icebreaker superstructure
- Ask the surviving scientist how to open the code-locked door on level 6
- Ask Mechanic for help with finding the second part of the code for the locked door on level 6
- Plant the hacking device in the server room in The Lab
- Return to Mechanic
- Arrive at the Icebreaker
- Reach the engine room
- Locate and obtain the engine room keycard (optional)
- Reach the damaged door on the roof of the engine room
- Return to the BTR driver
- Return to the BTR driver
- Break the chain on the door on the roof of the engine room using the SZ-1 charge
- Reach the code-locked door
- Use the correct access code
- Locate compartment C-1
- Locate and obtain the keycard with access to compartment C-1 (optional)
- Locate the entrance to the bridge (optional)
- Locate an alternative path to the bridge (optional)
- Reach the upper decks
- Thaw the hatch on the roof of the bridge
- Find something to thaw the hatch on the roof of the bridge (optional)
- Rescue the icebreaker captain
- Access Compartment C-1
- Search the shelves in compartment C-1
- Search the area near the workstation in compartment C-1
- Search the servers in compartment C-1
- Ask Mechanic for help decoding the hard drives from the icebreaker
- Hand over 3 found in raid Ultralink satellite modules to Mechanic
- Locate and obtain Ultralink satellite modules on the icebreaker (optional)
- Hand over 4 found in raid server RAM modules to Mechanic
- Locate and obtain the server RAM modules on the icebreaker (optional)
- Hand over 2 found in raid cryptographic processors to Mechanic
- Locate and obtain the cryptographic processors on the icebreaker (optional)
- Analyse the data from the icebreaker
- Inform the scientist about the captain's death
- Ask the BTR driver if he can help evacuate the scientist from the icebreaker
- Assist the smugglers with their conflict against the Rogues
- Return to the BTR driver
- Eliminate 20 targets on the icebreaker
- Hand over 5 respirators to the BTR driver
- Obtain respirators for the BTR driver (optional)
- Hand over 2 class 5 or higher ballistic plates to the BTR driver
- Obtain class 5+ ballistic plates for the BTR driver (optional)
- Hand over the Kirasa-N body armor to the BTR driver
- Obtain the Kirasa-N body armor for the BTR driver (optional)
- Inform the scientist that everything is ready for his evacuation
- Ask the BTR driver how the scientist's rescue went
Step by Step
Jump to a step 55 steps
- 1Talk to Mechanic
- 2Locate and repair the equipment under the cellular tower on Woods
- 3Report back to Mechanic
- 4Locate and obtain the Paradigm Shipping documentation
- 5Tell Mechanic about "Boreas"
- 6Arrange a transport to the icebreaker
- 7Hand over the AMG-10 fluid to Prapor
- 8Find an alternative transport to the icebreaker
- 9Return to the BTR driver
- 10Tell Mechanic that you found transport to the icebreaker
- 11Board the smuggler hovercraft on Shoreline
- 12Arrive at the Icebreaker
- 13Check if any crew members survived on the ship
- 14Access the engine room
- 15Find a way into the icebreaker superstructure
- 16Ask Mechanic about explosives
- 17Ask Prapor about explosives
- 18Reach the damaged door on the roof of the engine room
- 19Break the chain on the door on the roof of the engine room using the SZ-1 charge
- 20Enter the icebreaker superstructure from the roof of the engine room
- 21Find a way to the upper decks of the icebreaker superstructure
- 22Ask the surviving scientist how to open the code-locked door on level 6
- 23Ask Mechanic for help with finding the second part of the code for the locked door on level 6
- 24Plant the hacking device in the server room in The Lab
- 25Return to Mechanic
- 26Arrive at the Icebreaker
- 27Access the engine room
- 28Reach the damaged door on the roof of the engine room
- 29Break the chain on the door on the roof of the engine room using the SZ-1 charge
- 30Reach the code-locked door
- 31Use the correct access code
- 32Locate compartment C-1
- 33Reach the upper decks
- 34Thaw the hatch on the roof of the bridge
- 35Find something to thaw the hatch on the roof of the bridge
- 36Access Compartment C-1
- 37Rescue the icebreaker captain
- 38Search the shelves in compartment C-1
- 39Search the area near the workstation in compartment C-1
- 40Search the servers in compartment C-1
- 41Ask Mechanic for help decoding the hard drives from the icebreaker
- 42Hand over 3 found in raid Ultralink satellite modules to Mechanic
- 43Hand over 4 found in raid server RAM modules to Mechanic
- 44Hand over 2 found in raid cryptographic processors to Mechanic
- 45Analyse the data from the icebreaker
- 46Inform the scientist about the captain's death
- 47Ask the BTR driver if he can help evacuate the scientist from the icebreaker
- 48Assist the smugglers with their conflict against the Rogues
- 49Return to the BTR driver
- 50Eliminate 20 targets on the icebreaker
- 51Hand over 5 respirators to the BTR driver
- 52Hand over 2 class 5 or higher ballistic plates to the BTR driver
- 53Hand over the Kirasa-N body armor to the BTR driver
- 54Inform the scientist that everything is ready for his evacuation
- 55Ask the BTR driver how the scientist's rescue went
1Talk to Mechanic
Open the trader screen and ask Mechanic about the distress signal.
2Locate and repair the equipment under the cellular tower on Woods
Bring a Toolset to Woods and repair the equipment at the Scav bunker.
- Toolset
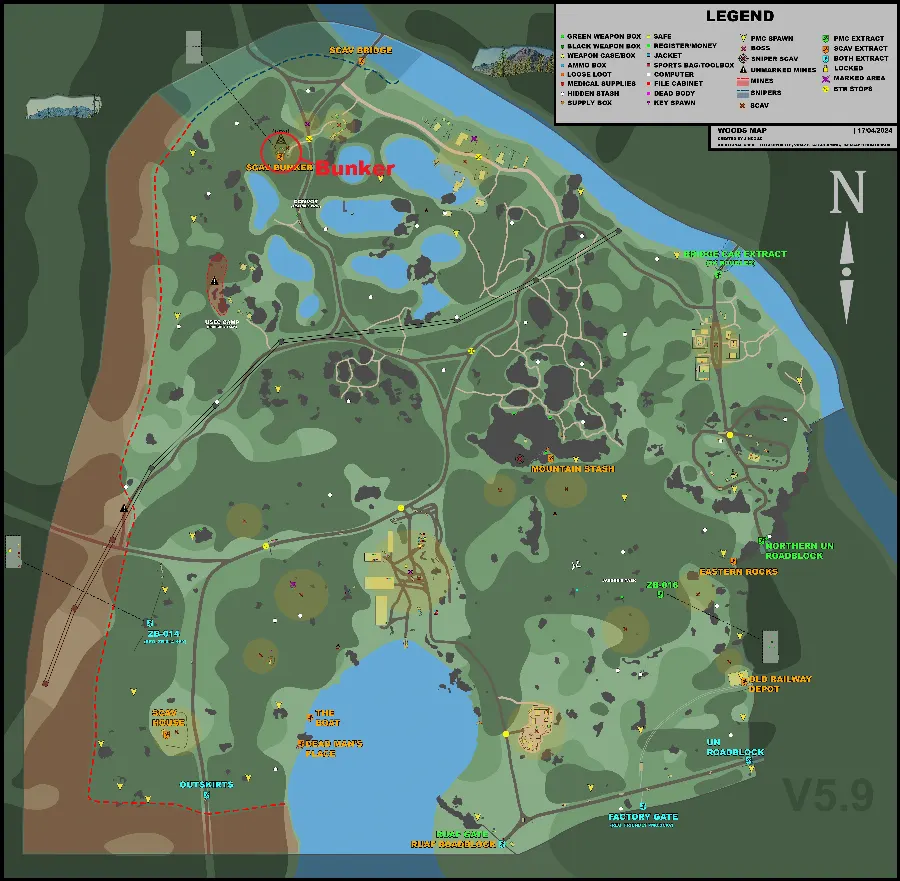
Scav bunker location marked on map 
The equipment 3Report back to Mechanic
Open the trader screen and speak to Mechanic.
4Locate and obtain the Paradigm Shipping documentation
The Paradigm Shipping directive waits in the warehouse at the freight yard in the north of Lighthouse. Pick it up and read it.
- Paradigm Shipping directive found in raid
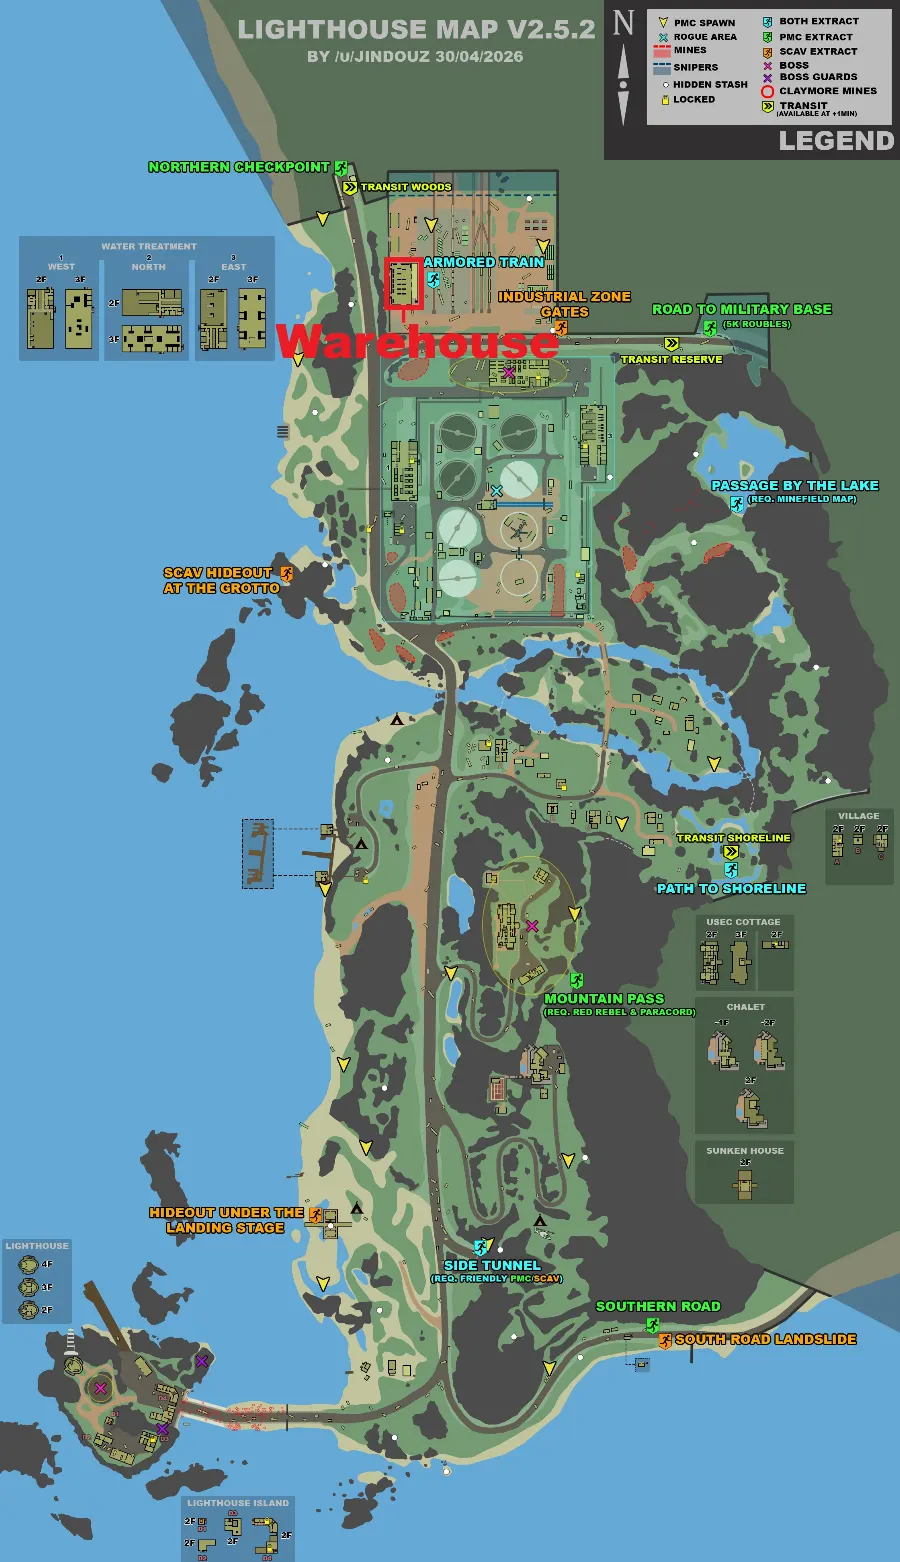
Warehouse location marked on map 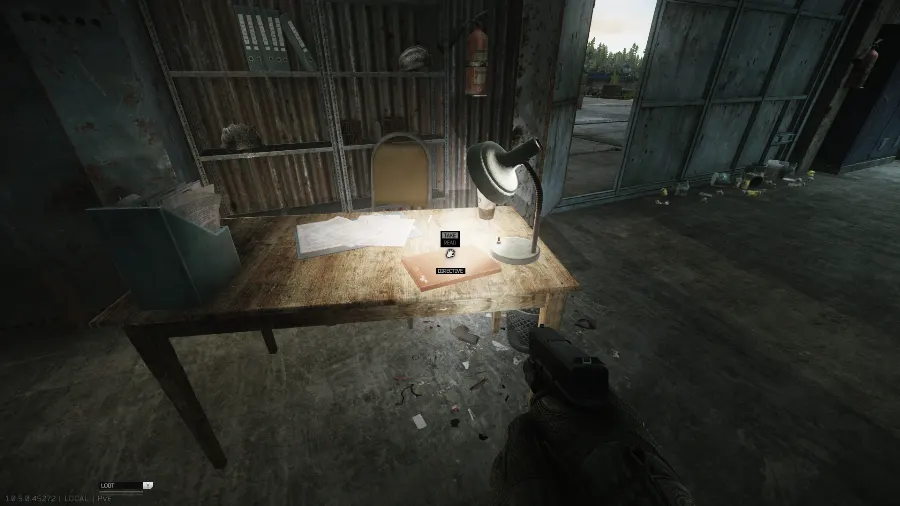
The directive on the table next to the lamp 5Tell Mechanic about "Boreas"
Open the trader screen and speak to Mechanic.
6Arrange a transport to the icebreaker
Open the trader screen and ask Prapor about the transport.
Hand over 3 Military power filters to Prapor — this only shows up if you held on to Prapor's Armored case during Falling Skies.
Eliminate any 30 targets on Reserve — this only shows up if you have not finished Falling Skies.
Launch a yellow signal flare at the Woods transit on Reserve — again, only if Falling Skies is unfinished. Stand at the Woods transit and put a yellow flare into the sky; it has to climb high enough or the objective will not tick. Either a handheld RSP-30 yellow flare, sold by Prapor at LL1, or a 26x75mm yellow flare cartridge from Jaeger LL1 fired out of a signal pistol will do the job. With the handheld RSP-30, angle it upwards, but not so far that it drops behind you.
- Military power filter ×3 found in raid

Transit location marked on map 
Transit location 
The transit 7Hand over the AMG-10 fluid to Prapor
The AMG-10 hydraulic fluid quest item spawns on Reserve, with several possible spots across the map. The barter version of the AMG-10 hydraulic fluid does not count for this objective.
- AMG-10 hydraulic fluid (quest item) found in raid
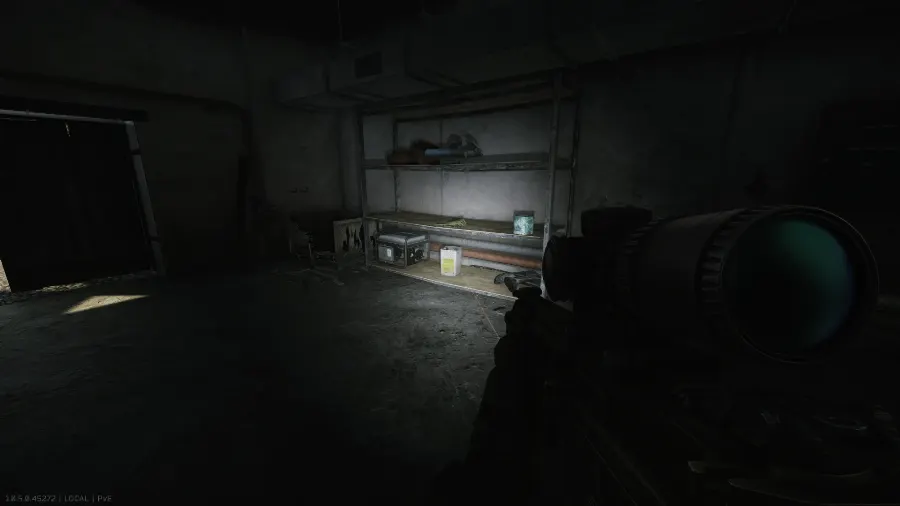
1: On one of the shelves in the northern storage area of the black bishop building basement 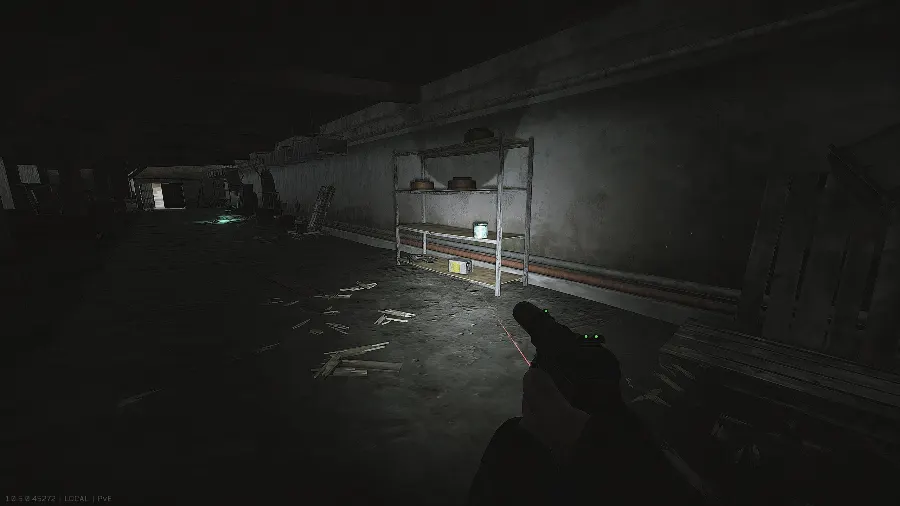
2: On one of the shelves in the northern storage area of the black bishop building basement 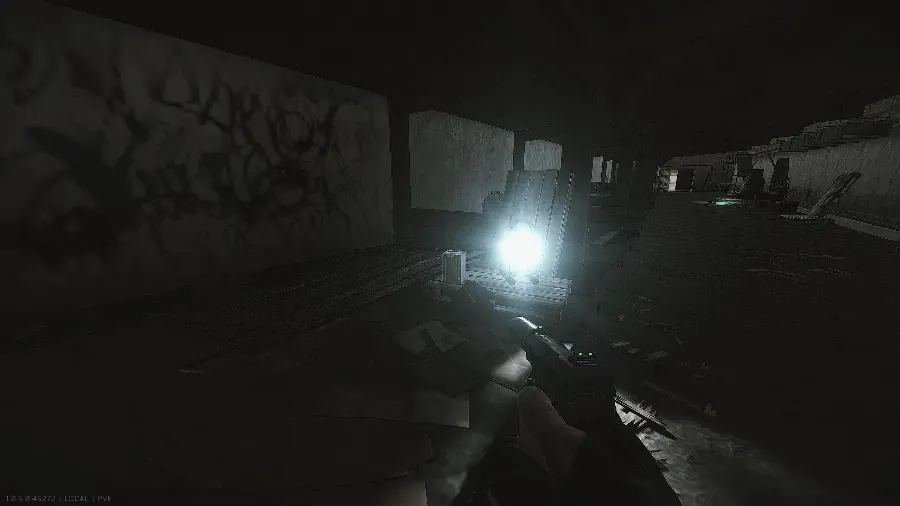
3: On the pallet with the spotlight in the northern storage area of the black bishop building basement 
4: On the open wooden crate inside the helicopter at the parade ground 
5: Under the ladder inside the helicopter at the parade ground 
6: Next to the forklift behind the helicopter at the parade ground 8Find an alternative transport to the icebreaker
Speak to the BTR Driver and ask him about the transport.
Return to the Hideout — this only shows up if you have finished The Price of Independence. Leave the raid, either by extracting or by dying.
Hand over 200 7.62x54mm R BT gzh rounds to the BTR driver — this only shows up if you have finished Choose Your Friends Wisely.
Locate and obtain Skier's reports on Customs — same condition. The docs lie in the ditch between the Scav base and the laboratory.
Burn Skier's reports on Customs — same condition. Any fire barrel on Customs works; the nearest one to the pickup sits in the middle living quarters of the Scav base.
Eliminate any 15 targets at the smugglers' territories — same condition. The smuggler bases are on Shoreline and Interchange.
Eliminate any 10 targets at the smugglers' territories — this version appears instead if you have completed neither The Price of Independence nor Choose Your Friends Wisely. Same two smuggler bases.
- 7.62x54mm R BT gzh ×200
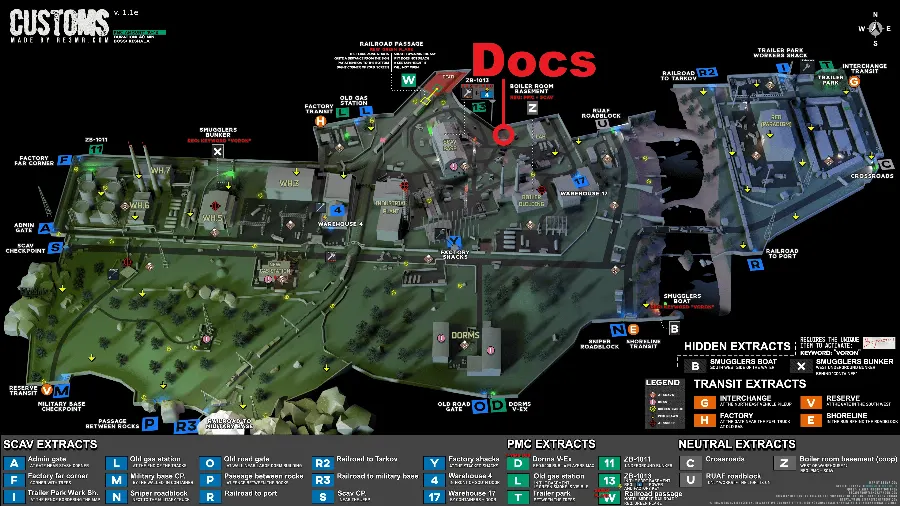
Location marked on map 
The docs 
Scav base location marked on map 
The Scav base 
The fire barrel 
Shoreline smuggler base location marked on map 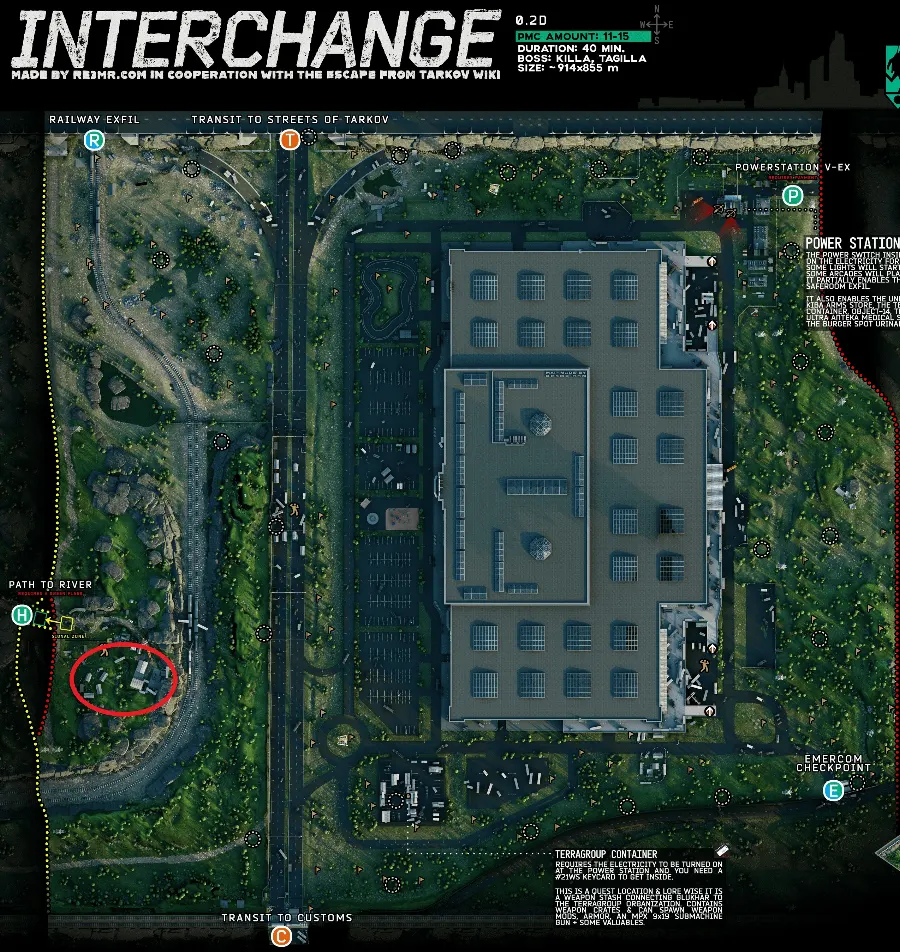
Interchange smuggler base location marked on map 9Return to the BTR driver
Speak to the BTR Driver.
10Tell Mechanic that you found transport to the icebreaker
Open the trader screen and speak to Mechanic.
11Board the smuggler hovercraft on Shoreline
The hovercraft sits at the pier on Shoreline, and boarding it costs 700,000 Roubles. Extracting from the icebreaker afterwards takes a green flare and 2,400 Euros.

Hovercraft location marked on map 
The hovercraft 12Arrive at the Icebreaker
Enter Icebreaker through the Shoreline transit.
13Check if any crew members survived on the ship
The intercom is on level 1 of the Icebreaker, on the east side of the ship. Use it to speak to the scientist.
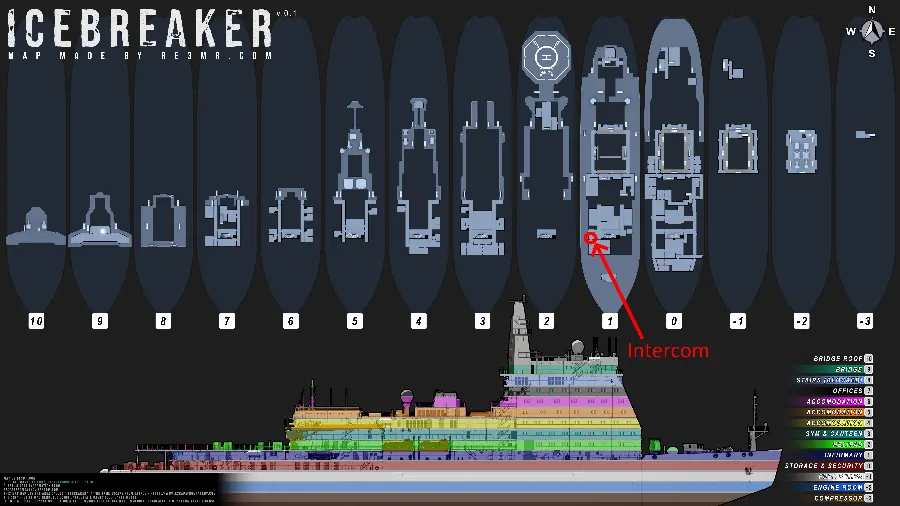
Intercom location marked on map 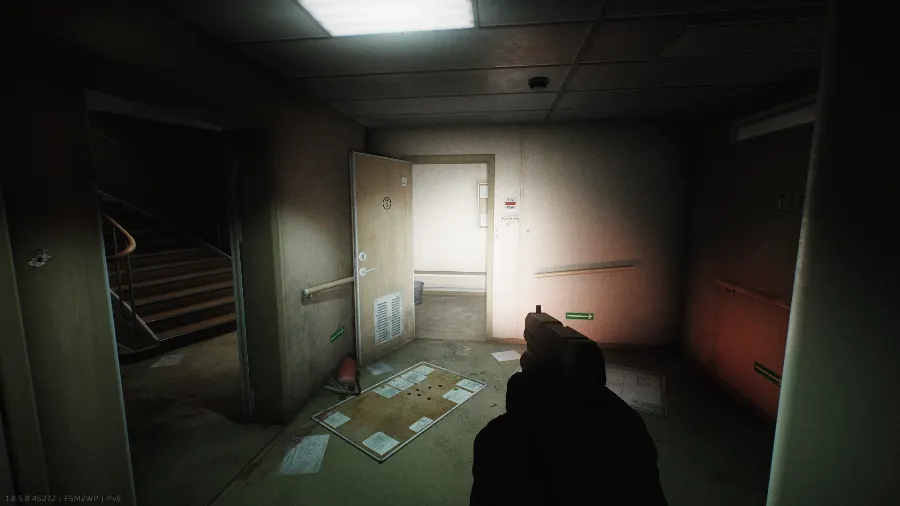
The door next to the stairs leading to the intercom 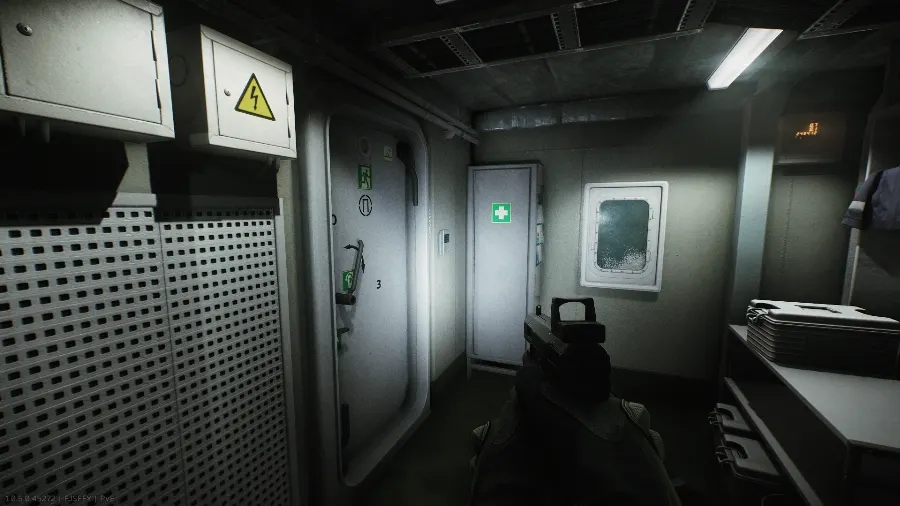
The intercom 14Access the engine room
Getting in takes the Boreas engine room keycard. Halfway across the engine room, Black Division fighters step out of doors on the catwalks ahead of you.
Locate and obtain the engine room keycard — it lies beside an engineer's body in the central medical room on level 1.
Reach the engine room — head for level 0 on the east side of the ship and find the locked door with a keycard reader right beside the control room. Carry on through the ship and take the stairs up to level 1, where the engine room doors are. Unseal them, step inside, then go down to level -2.
- Boreas engine room keycard

The keycard spawn next to the engineer head 
The keycard spawn in the right hand of the engineer 
The keycard spawn in the left hand of the engineer 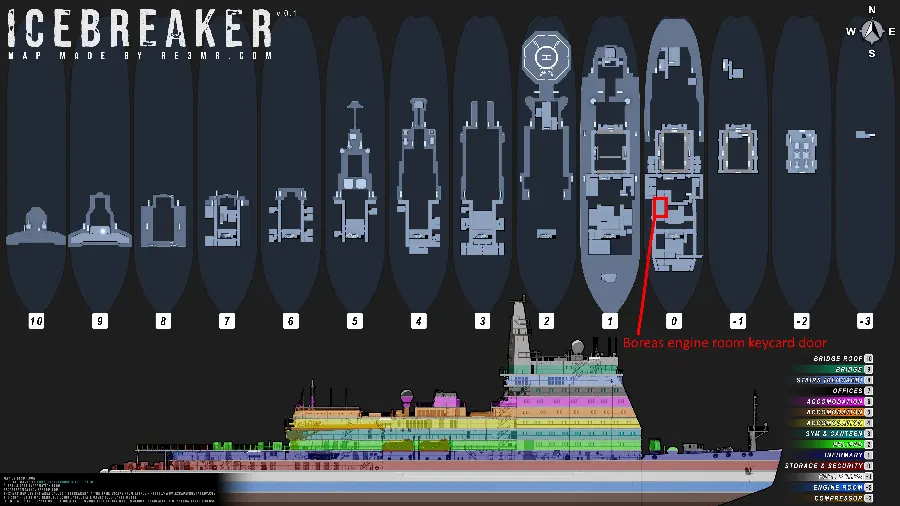
The locked door location marked on map 
The door to the room 
The room location marked on map 
The door to unseal 
Access to the engine room 
The engine room 15Find a way into the icebreaker superstructure
Make for the extraction zone, but instead of extracting, drop two levels, come round the helipad, follow the side of the ship all the way along, and climb to level 3 to reach a chained door.
Black Division hold the helipad, with a second group underneath it.
Try the damaged, chained door and you will be asked to find an explosive. From that point you can extract from the Icebreaker, and the quest Stick to It unlocks.

The damaged door location marked on map 
Take the stairs on the left after leaving the drone hangar and continue all round the zone 
The way to the Icebreaker superstructure 16Ask Mechanic about explosives
Open the trader screen and speak to Mechanic.
17Ask Prapor about explosives
Open the trader screen and speak to Prapor. This opens up the SZ-1 explosive charge (Icebreaker) for purchase at Prapor LL1.
18Reach the damaged door on the roof of the engine room
Make your way back to the damaged door with the chains on it.
The damaged door location marked on map Take the stairs on the left after leaving the drone hangar and continue all round the zone 
The damaged door 19Break the chain on the door on the roof of the engine room using the SZ-1 charge
With the SZ-1 explosive charge (Icebreaker) on you, place it on the chain at the damaged door to destroy it.
- SZ-1 explosive charge (Icebreaker)
The door with the chains to place the charge 20Enter the icebreaker superstructure from the roof of the engine room
Past the door lie the crew quarters. The Wedge squad is inside, and a teargas grenade is rigged as a tripwire on the entrance door to the quarters.

The entrance of the crew quarter 21Find a way to the upper decks of the icebreaker superstructure
With the crew quarters cleared and The Wedge dead, go up to level 5, step outside the quarters, and take the stairs to a code-locked door that leads to the upper decks.

The door to unseal 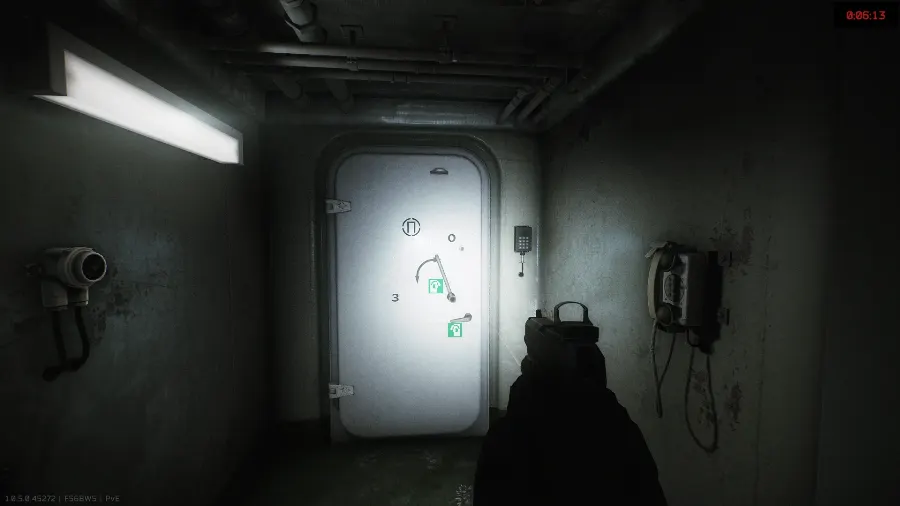
The code-locked door 22Ask the surviving scientist how to open the code-locked door on level 6
Use the intercom on level 1 of the Icebreaker, on the east side of the ship, to speak to the scientist.
Intercom location marked on map The door next to the stairs leading to the intercom The intercom 23Ask Mechanic for help with finding the second part of the code for the locked door on level 6
Open the trader screen and speak to Mechanic.
24Plant the hacking device in the server room in The Lab
Stash the Local network hacking device in the server room on the first floor of The Lab. Mechanic sends you one by in-game mail and offers a barter if you need more.
- Local network hacking device

Stashing location marked on map 
Stashing location next to the office chairs 25Return to Mechanic
Open the trader screen and speak to Mechanic.
26Arrive at the Icebreaker
Enter Icebreaker either through the Shoreline transit or straight from the menu.
27Access the engine room
Use the Boreas engine room keycard to open the way in. Once you are halfway across the engine room, Black Division push out of doors on the catwalks in front of you.
Locate and obtain the engine room keycard — look next to an engineer's body in the central medical room on level 1.
Reach the engine room — from level 0 on the east side of the ship, find the keycard-reader door beside the control room. Work on through the ship and climb the stairs to level 1 to reach the engine room doors. Unseal them, go in, then take the stairs down to level -2.
- Boreas engine room keycard
The keycard spawn next to the engineer head The keycard spawn in the right hand of the engineer The keycard spawn in the left hand of the engineer The locked door location marked on map The door to the room The room location marked on map The door to unseal Access to the engine room The engine room 28Reach the damaged door on the roof of the engine room
Head back once more to the damaged door with the chains.
The damaged door location marked on map Take the stairs on the left after leaving the drone hangar and continue all round the zone The damaged door 29Break the chain on the door on the roof of the engine room using the SZ-1 charge
Carrying the SZ-1 explosive charge (Icebreaker), set it on the chain at the damaged door to blow it apart.
- SZ-1 explosive charge (Icebreaker)
The door with the chains to place the charge 30Reach the code-locked door
Once the crew quarters are clear and The Wedge is dead, move up to level 5, leave the quarters, and take the stairs to the code-locked door leading to the upper decks.
The door to unseal The code-locked door 31Use the correct access code
Punch 3-1-2-2-2-0 into the keypad to open the door. That code never changes between raids, and every door in the zone that opens to the exterior uses the same one.
The code-locked door 32Locate compartment C-1
Compartment C-1 sits on level 7, next to the exit that leads outside. Opening it takes the Compartment C-1 keycard.

The location on the map 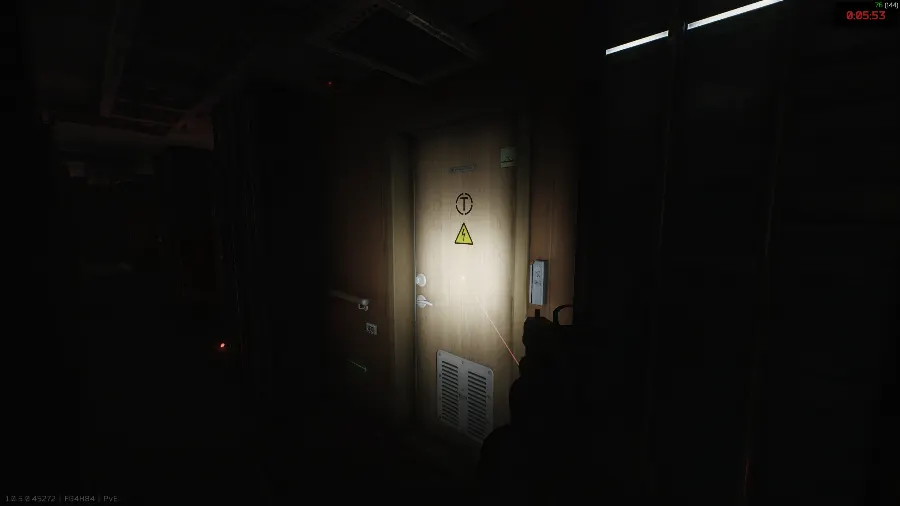
The door to the compartment C-1 33Reach the upper decks
Leave the level 7 rooms using the 3-1-2-2-2-0 code and climb the stairs to reach the bridge.

The door to the bridge 34Thaw the hatch on the roof of the bridge
The hatch sits on the roof of the bridge, frozen solid along with its lever. Thaw it with the BBQ-S43 gas torch.
- BBQ-S43 gas torch

The hatch to thaw 35Find something to thaw the hatch on the roof of the bridge
The BBQ-S43 gas torch spawns on level 3, in the kitchen where The Wedge turns up.
- BBQ-S43 gas torch
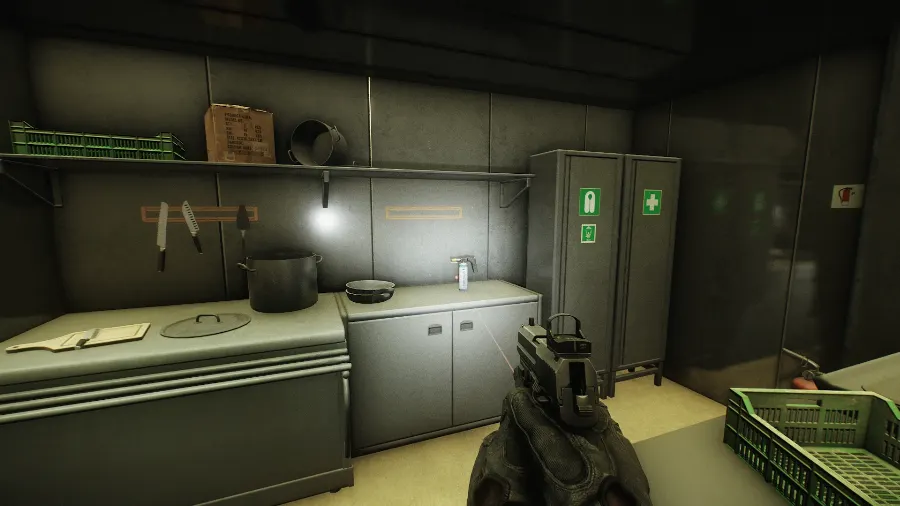
On a countertop next to lockers 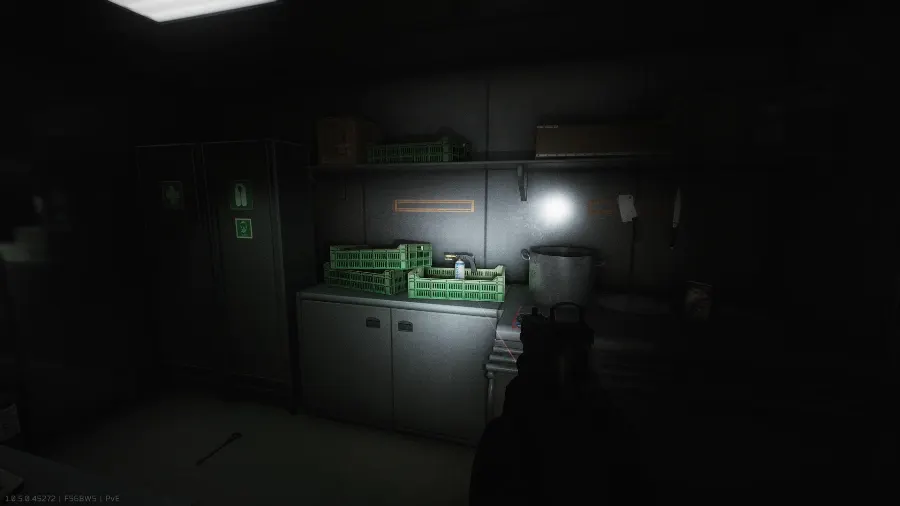
Inside a green crate on a countertop next to lockers 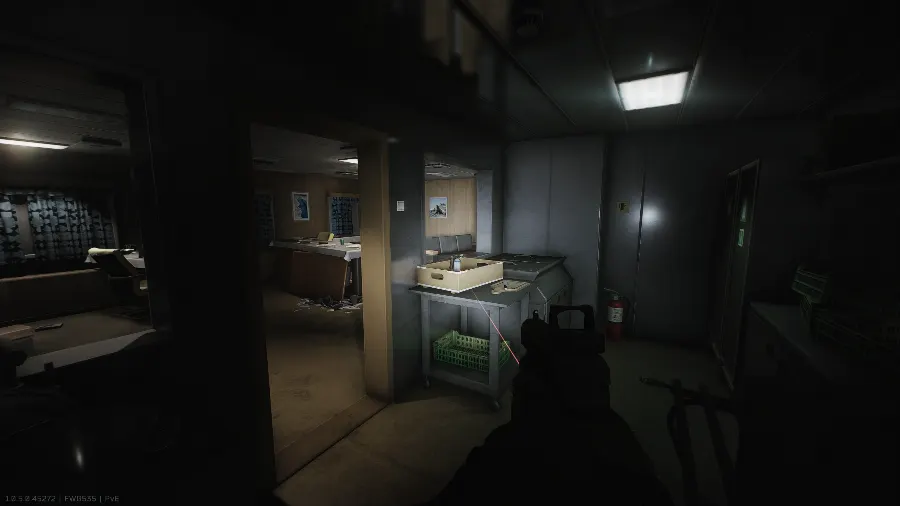
Inside a wooden crate on a serving trolley 36Access Compartment C-1
Getting into the room takes the Compartment C-1 keycard, which is in the left hand of a body on level 9 of the Icebreaker.
- Compartment C-1 keycard
Room location marked on map Door to the room 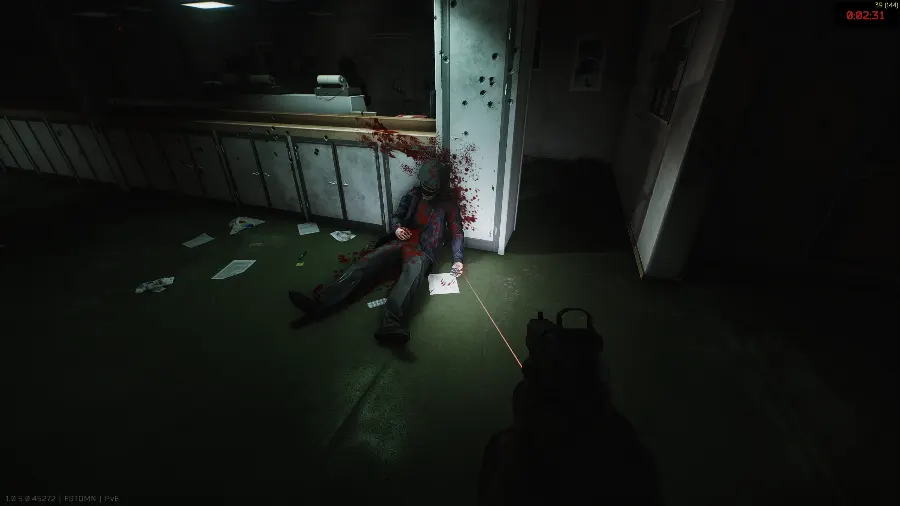
In the left hand of a body on level 9 of Icebreaker 37Rescue the icebreaker captain
The objective ticks the moment you reach the captain's body on the bridge, on level 9.
The body of the captain. 38Search the shelves in compartment C-1
The Hard drive from compartment C-1 (3) sits on the shelves to your left as you step into the room.
- Hard drive from compartment C-1 (3) found in raid
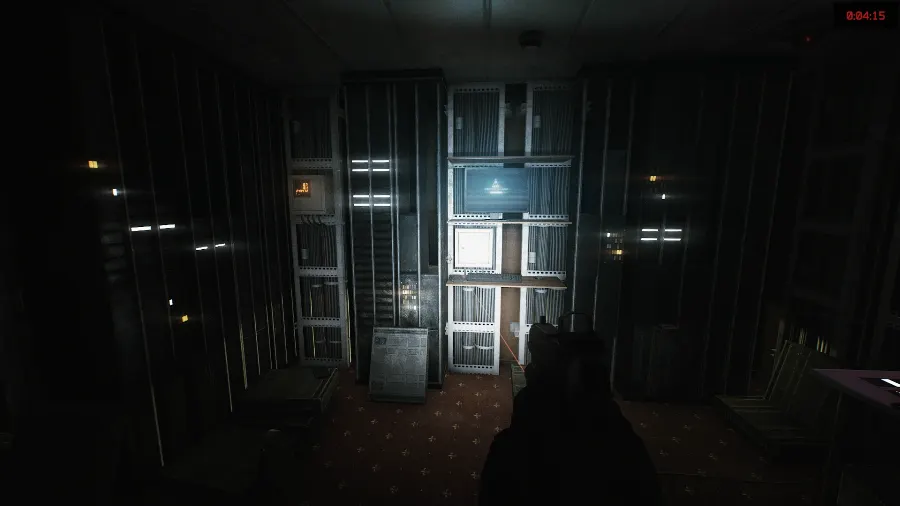
On the shelf with the keyboard 39Search the area near the workstation in compartment C-1
The Hard drive from compartment C-1 (1) is under the desk, sitting on the PC blocks.
- Hard drive from compartment C-1 (1) found in raid
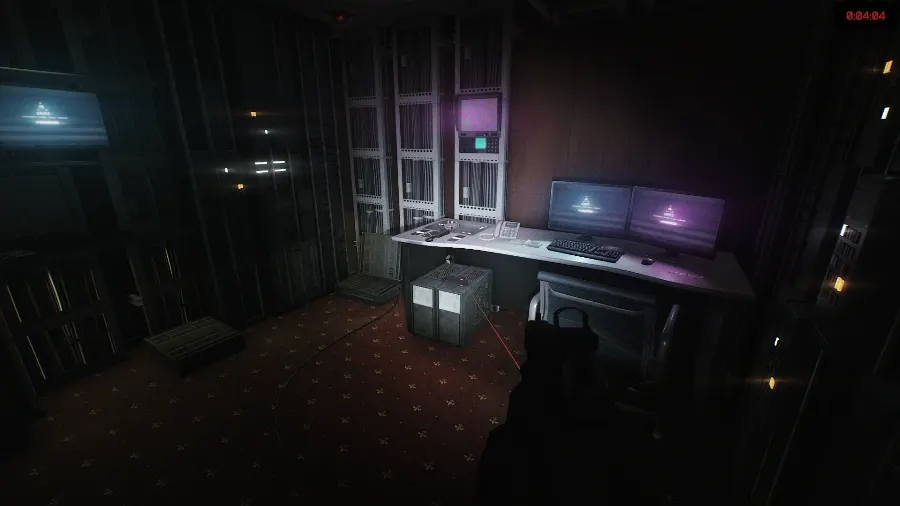
On top of the PC blocks under the desk 40Search the servers in compartment C-1
The Hard drive from compartment C-1 (2) rests on top of the servers standing on the floor.
- Hard drive from compartment C-1 (2) found in raid
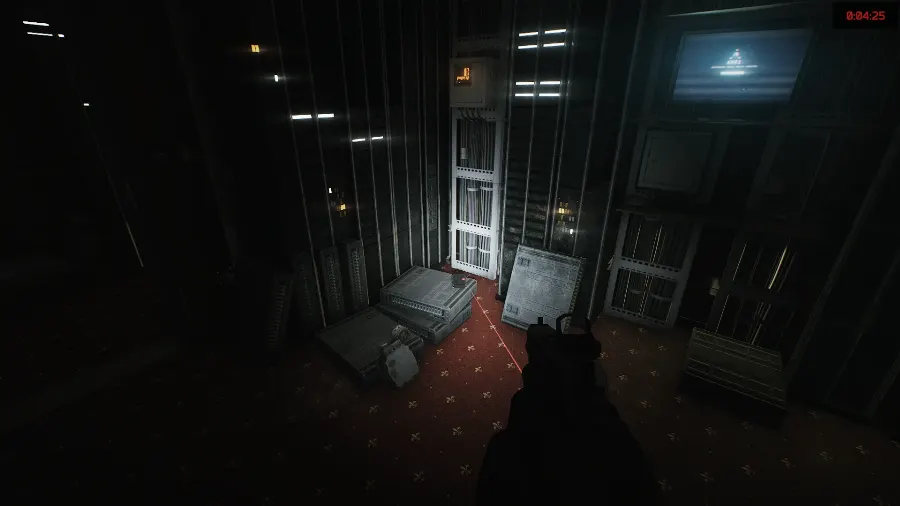
On top of the server on the floor. 41Ask Mechanic for help decoding the hard drives from the icebreaker
Open the trader screen and give Mechanic all three hard drives.
Handing them over opens up A Wedge Between Us, Fresh Stock, Oil Change and War Never Changes. None of them have to be done to carry on with this story chapter.
- Hard drive from compartment C-1 (1) found in raid
- Hard drive from compartment C-1 (2) found in raid
- Hard drive from compartment C-1 (3) found in raid
42Hand over 3 found in raid Ultralink satellite modules to Mechanic
Open the trader screen and give Mechanic the 3 Ultralink satellite communication modules.
- Ultralink satellite communication module ×3 found in raid
43Hand over 4 found in raid server RAM modules to Mechanic
Open the trader screen and give Mechanic the 4 Memento Server RAM Modules.
- Memento Server RAM Module ×4 found in raid
44Hand over 2 found in raid cryptographic processors to Mechanic
Open the trader screen and give Mechanic the 2 IBX Gigachad cryptographic processors. You get 1x Icebreaker archive data in return.
- IBX Gigachad cryptographic processor ×2 found in raid
45Analyse the data from the icebreaker
The Icebreaker archive data arrives in your messages. Read it from the handbook.
- Icebreaker archive data
46Inform the scientist about the captain's death
Use the intercom on level 1 of the Icebreaker, on the east side of the ship, to speak to the scientist.
Intercom location marked on map The door next to the stairs leading to the intercom The intercom 47Ask the BTR driver if he can help evacuate the scientist from the icebreaker
Speak to the BTR Driver.
48Assist the smugglers with their conflict against the Rogues
Completing the quest Hangover clears this objective.
49Return to the BTR driver
Speak to the BTR Driver.
50Eliminate 20 targets on the icebreaker
Kill any 20 targets on Icebreaker.
51Hand over 5 respirators to the BTR driver
- Respirator ×5
- Gentex Ops-Core SOTR respirator ×5
- GP-5 gas mask ×5
- GP-7 gas mask ×5
- Avon M53A1 gas mask ×5
52Hand over 2 class 5 or higher ballistic plates to the BTR driver
53Hand over the Kirasa-N body armor to the BTR driver
- BNTI Kirasa-N body armor
54Inform the scientist that everything is ready for his evacuation
Use the intercom on level 1 of the Icebreaker, on the east side of the ship, to speak to the scientist.
Intercom location marked on map The door next to the stairs leading to the intercom The intercom 55Ask the BTR driver how the scientist's rescue went
Find the BTR Driver on either Woods or Streets of Tarkov. This hands you experience and 1x Compartment C-3 keycard.
Walkthrough facts and screenshots from the Escape from Tarkov Wiki (CC BY-SA), rewritten for this page.
2 Locate and repair the equipment under the cellular tower on Woods
- Toolset — Required
3 Report back to Mechanic
4 Locate and obtain the Paradigm Shipping documentation
5 Tell Mechanic about "Boreas"
6 Arrange a transport to the icebreaker
- 3× Military power filter — Handover item found in raid
7 Hand over the AMG-10 fluid to Prapor
8 Find an alternative transport to the icebreaker
9 Return to the BTR driver
10 Tell Mechanic that you found transport to the icebreaker
11 Board the smuggler hovercraft on Shoreline
12 Arrive at the Icebreaker
13 Check if any crew members survived on the ship
14 Access the engine room
15 Find a way into the icebreaker superstructure
16 Ask Mechanic about explosives
17 Ask Prapor about explosives
- Unlocks purchase of SZ-1 explosive charge (Icebreaker) at Prapor LL1
18 Reach the damaged door on the roof of the engine room
19 Break the chain on the door on the roof of the engine room using the SZ-1 charge
20 Enter the icebreaker superstructure from the roof of the engine room
21 Find a way to the upper decks of the icebreaker superstructure
22 Ask the surviving scientist how to open the code-locked door on level 6
23 Ask Mechanic for help with finding the second part of the code for the locked door on level 6
24 Plant the hacking device in the server room in The Lab
25 Return to Mechanic
26 Arrive at the Icebreaker
27 Access the engine room
28 Reach the damaged door on the roof of the engine room
29 Break the chain on the door on the roof of the engine room using the SZ-1 charge
30 Reach the code-locked door
31 Use the correct access code
32 Locate compartment C-1
33 Reach the upper decks
34 Thaw the hatch on the roof of the bridge
35 Find something to thaw the hatch on the roof of the bridge
36 Access Compartment C-1
37 Rescue the icebreaker captain
38 Search the shelves in compartment C-1
39 Search the area near the workstation in compartment C-1
40 Search the servers in compartment C-1
41 Ask Mechanic for help decoding the hard drives from the icebreaker
42 Hand over 3 found in raid Ultralink satellite modules to Mechanic
43 Hand over 4 found in raid server RAM modules to Mechanic
44 Hand over 2 found in raid cryptographic processors to Mechanic
- 1x Icebreaker archive data
45 Analyse the data from the icebreaker
46 Inform the scientist about the captain's death
47 Ask the BTR driver if he can help evacuate the scientist from the icebreaker
48 Assist the smugglers with their conflict against the Rogues
49 Return to the BTR driver
50 Eliminate 20 targets on the icebreaker
51 Hand over 5 respirators to the BTR driver
52 Hand over 2 class 5 or higher ballistic plates to the BTR driver
- 2× Any class 5 or higher armor plate compatible with the Kirasa-N body armor — Handover item
53 Hand over the Kirasa-N body armor to the BTR driver
54 Inform the scientist that everything is ready for his evacuation
55 Ask the BTR driver how the scientist's rescue went
- 1x Compartment C-3 keycard
Requirements & Notes
Story chapter in Escape from Tarkov.
Obtain a Paradigm Shipping poster or check the distress signal via the radio system at the Intelligence Center level 3 in the Hideout.
Required for Kappa container - NO


